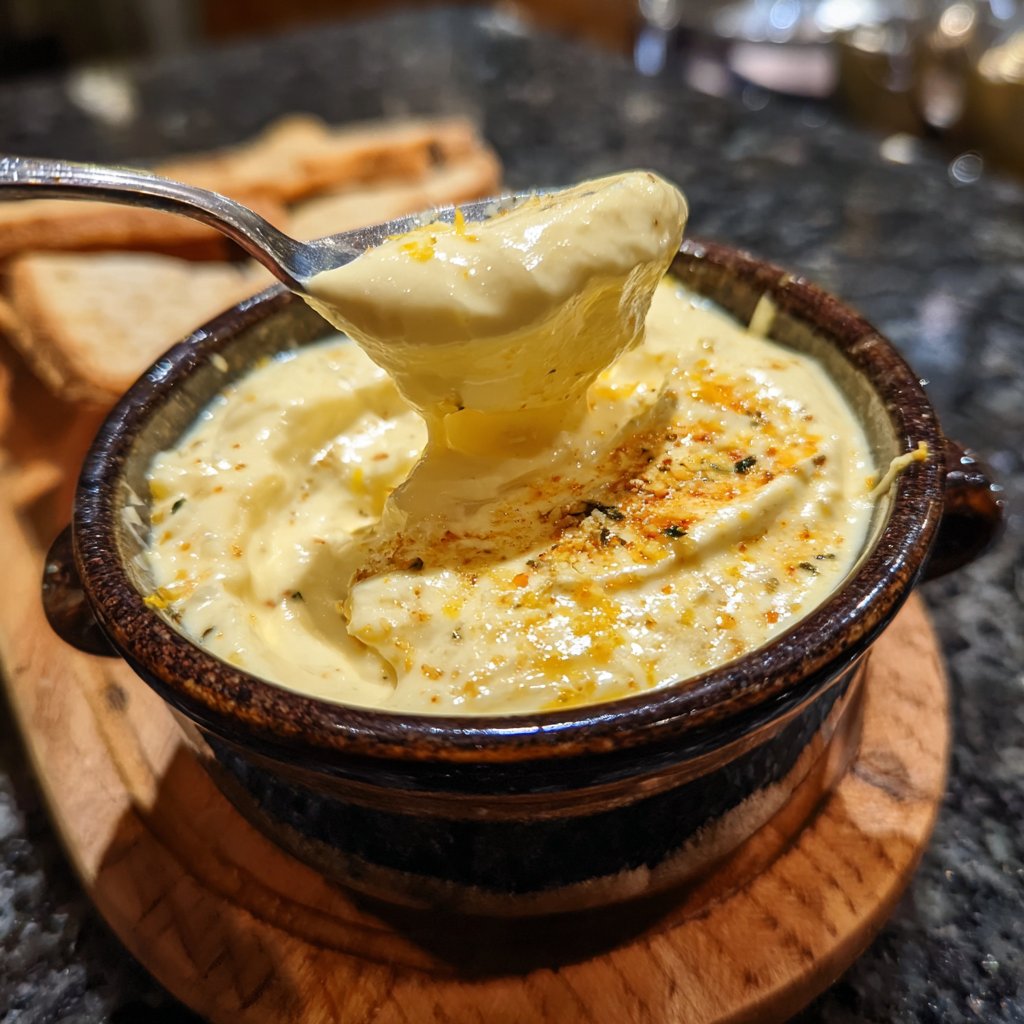
Creamy Aioli Dip
Highlighted under: Hearty Home Delights
I absolutely love making creamy aioli dip at home for gatherings. It’s a versatile sauce that elevates any appetizer platter and pairs wonderfully with veggies, chips, or seafood. The combination of garlic, egg yolk, and lemon juice creates a rich, zingy flavor that never fails to impress. Each time I make it, I experiment with different herbs or spices to customize it. It’s surprisingly easy to whip up, requiring minimal ingredients and just a little patience for the perfect emulsion!
When I first learned how to make aioli, I was surprised by how simple yet delicious it could be. The key is to slowly incorporate the oil while whisking, which creates that lovely creamy texture we all adore. Using fresh garlic instead of pre-prepared results in a more vibrant and bold flavor that really makes the dip stand out.
One time, I served this aioli dip at a backyard BBQ, and it was a huge hit. Guests kept coming back for more! I also discovered that adding a touch of smoked paprika gives it a delightful twist, which I now consider essential. Experimenting with this dip is not only fun but also a chance to showcase your creativity!

Why You'll Love This Recipe
- Rich, garlicky flavor that enhances any dish
- Smooth and creamy consistency that's perfect for dipping
- Easy to customize with herbs or spices to suit your taste
Understanding the Emulsion
Creating a successful emulsion is key to achieving that rich, creamy texture that aioli is known for. The process requires you to add the olive oil very slowly at first; this allows the oil to blend smoothly with the egg yolks and garlic instead of separating. If you add the oil too quickly, your aioli may break, leading to a runny consistency. If this happens, don't fret! You can start a new mixture with another egg yolk and gradually whisk in the broken aioli to save it.
When emulsifying, whisking continuously is crucial. I recommend using a balloon whisk or a hand mixer to ensure your aioli becomes light and fluffy. Keep an eye on the color change as you whisk; the mix should turn a pale yellow and become glossy as it comes together. If you notice any graininess, continue whisking until smooth, but be mindful of not overworking it, which could also affect the consistency.
Flavoring Variations and Customizations
One of the joys of making aioli is how easy it is to customize the flavors. While garlic is the classic starting point, feel free to experiment with ingredients like roasted red peppers or sun-dried tomatoes for a sweeter, smokier taste. Adding a teaspoon of Dijon mustard can introduce a tangy kick, enhancing the overall flavor profile. And if you are feeling adventurous, a sprinkle of cayenne or smoked paprika will offer depth with a hint of heat.
In terms of herbs, it's vital to consider how each will infuse into the aioli. Fresh herbs should be finely chopped before being added to ensure their essential oils get evenly distributed. For a bright, herby twist, try adding dill or cilantro. If you like a more robust flavor, consider thyme or oregano. Just remember, start with a small amount and taste as you go – you can always add more, but it's hard to dial back once the flavors are in!
Ingredients
Gather these simple ingredients before you start making your aioli dip:
Ingredients
- 2 large egg yolks
- 2 cloves garlic, minced
- 1 tablespoon lemon juice
- 1 cup olive oil
- Salt to taste
- Pepper to taste
- Optional: fresh herbs (like parsley or basil)
Make sure to use high-quality oil for the best flavor!
Instructions
Follow these steps to create a delicious creamy aioli dip:
Prepare the Base
In a medium bowl, whisk together the egg yolks, minced garlic, and lemon juice until well combined.
Emulsify the Mixture
Slowly drizzle in the olive oil while whisking continuously. Start with just a few drops of oil and gradually increase the amount as the mixture thickens.
Season the Dip
Once all the oil is incorporated, season your aioli with salt and pepper to taste. If desired, stir in fresh herbs for added flavor.
Chill and Serve
Cover and refrigerate the aioli dip for at least 30 minutes to let the flavors meld before serving.
Your creamy aioli dip is now ready to be enjoyed!
Pro Tips
- For an extra flavor kick, try adding a pinch of cayenne pepper or a few drops of Tabasco sauce for heat.
Storage and Make-Ahead Tips
Aioli can be made in advance, which makes it perfect for planning gatherings. After making your dip, transfer it to an airtight container and store it in the refrigerator. It can last for up to three days, which allows the flavors to deepen and meld beautifully. Just be sure to give it a good stir before serving, as some separation may occur during storage.
If you're preparing for a larger gathering, consider doubling or even tripling the recipe. This dip scales up well, and you'll ensure that there's enough for everyone. Just adjust your ingredients accordingly, and remember to whisk longer to combine the larger quantities efficiently. If you find yourself short on olive oil, you can substitute half with a neutral oil like canola, but this will slightly change the flavor profile.
Serving Suggestions
Creamy aioli dip is incredibly versatile and pairs wonderfully with a variety of dippers. For a classic presentation, serve it alongside fresh-cut vegetables like carrots, celery, and bell peppers. It also complements crispy tortilla chips or pita bread beautifully. If you're serving seafood, consider it a dip for shrimp or crab cakes—its rich texture enhances the flavor of the seafood.
To elevate your serving experience further, consider arranging a charcuterie board complete with aioli, cheeses, cured meats, and fresh baguettes. This not only makes for a stunning display, but it also allows guests to dip and spread to their hearts' content. For a more formal occasion, use small dipping bowls so each guest can enjoy their aioli dip without compromising its freshness.
Questions About Recipes
→ Can I make aioli without raw eggs?
Yes, you can use store-bought mayonnaise as a base instead of raw eggs for a simpler version.
→ How long can I store aioli dip?
Homemade aioli can be stored in an airtight container in the refrigerator for up to one week.
→ What can I serve with aioli dip?
Aioli is perfect for dipping vegetables, chips, seafood, or even as a spread on sandwiches.
→ How do I fix aioli that won't emulsify?
If your aioli doesn't emulsify, try adding a teaspoon of warm water and whisking vigorously until it thickens.
Creamy Aioli Dip
Created by: Rowena Clarke
Recipe Type: Hearty Home Delights
Skill Level: Intermediate
Final Quantity: 1 cup
What You'll Need
Ingredients
- 2 large egg yolks
- 2 cloves garlic, minced
- 1 tablespoon lemon juice
- 1 cup olive oil
- Salt to taste
- Pepper to taste
- Optional: fresh herbs (like parsley or basil)
How-To Steps
In a medium bowl, whisk together the egg yolks, minced garlic, and lemon juice until well combined.
Slowly drizzle in the olive oil while whisking continuously. Start with just a few drops of oil and gradually increase the amount as the mixture thickens.
Once all the oil is incorporated, season your aioli with salt and pepper to taste. If desired, stir in fresh herbs for added flavor.
Cover and refrigerate the aioli dip for at least 30 minutes to let the flavors meld before serving.
Extra Tips
- For an extra flavor kick, try adding a pinch of cayenne pepper or a few drops of Tabasco sauce for heat.
Nutritional Breakdown (Per Serving)
- Calories: 200 kcal
- Total Fat: 20g
- Saturated Fat: 3g
- Cholesterol: 135mg
- Sodium: 50mg
- Total Carbohydrates: 1g
- Dietary Fiber: 0g
- Sugars: 0g
- Protein: 2g