Healthy Snack No Bake Granola Bars
I love creating snacks that are both nutritious and easy to make, and these no-bake granola bars fit the bill perfectly! With just a handful of wholesome ingredients, I can whip up a batch in no time. They’re great for those busy days when I need a quick energy boost, and I can customize them with my favorite nuts and dried fruits. We often keep a stash in the fridge for a healthy option whenever cravings hit!
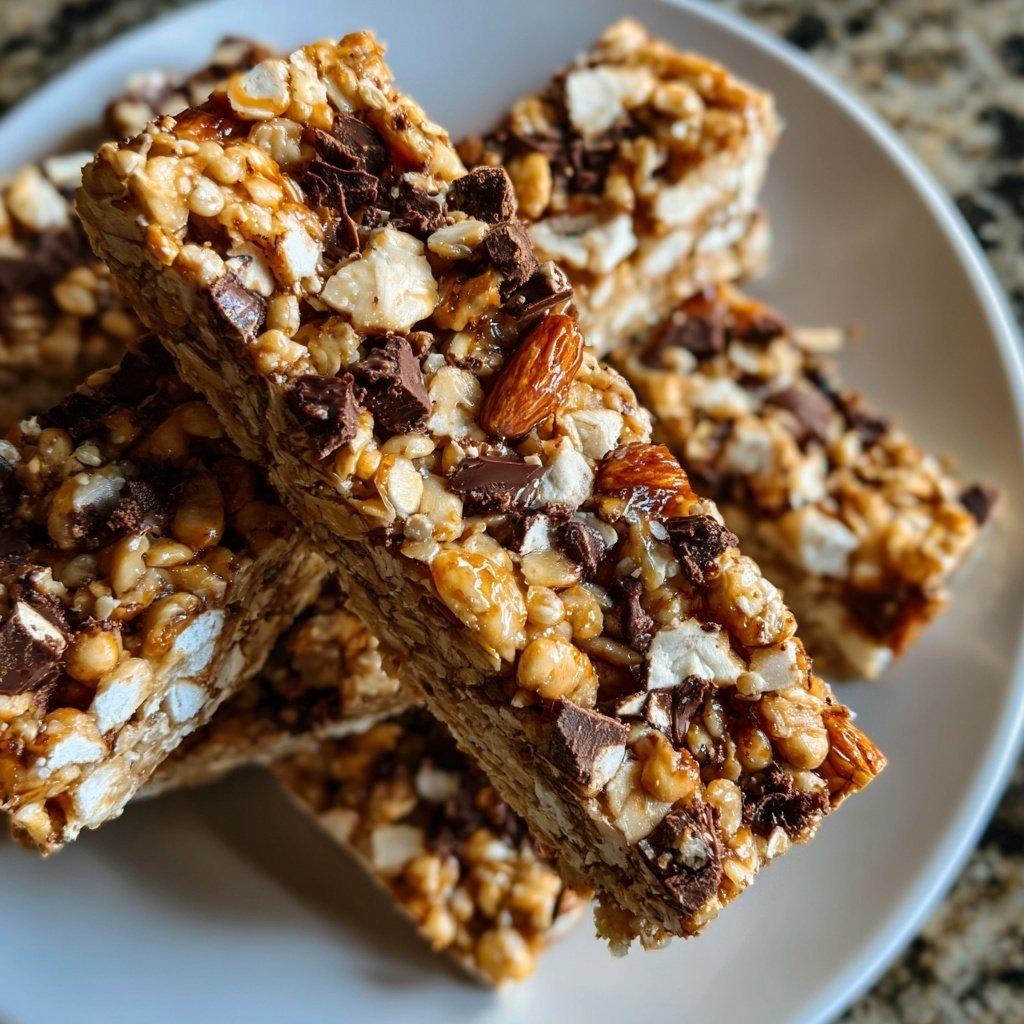
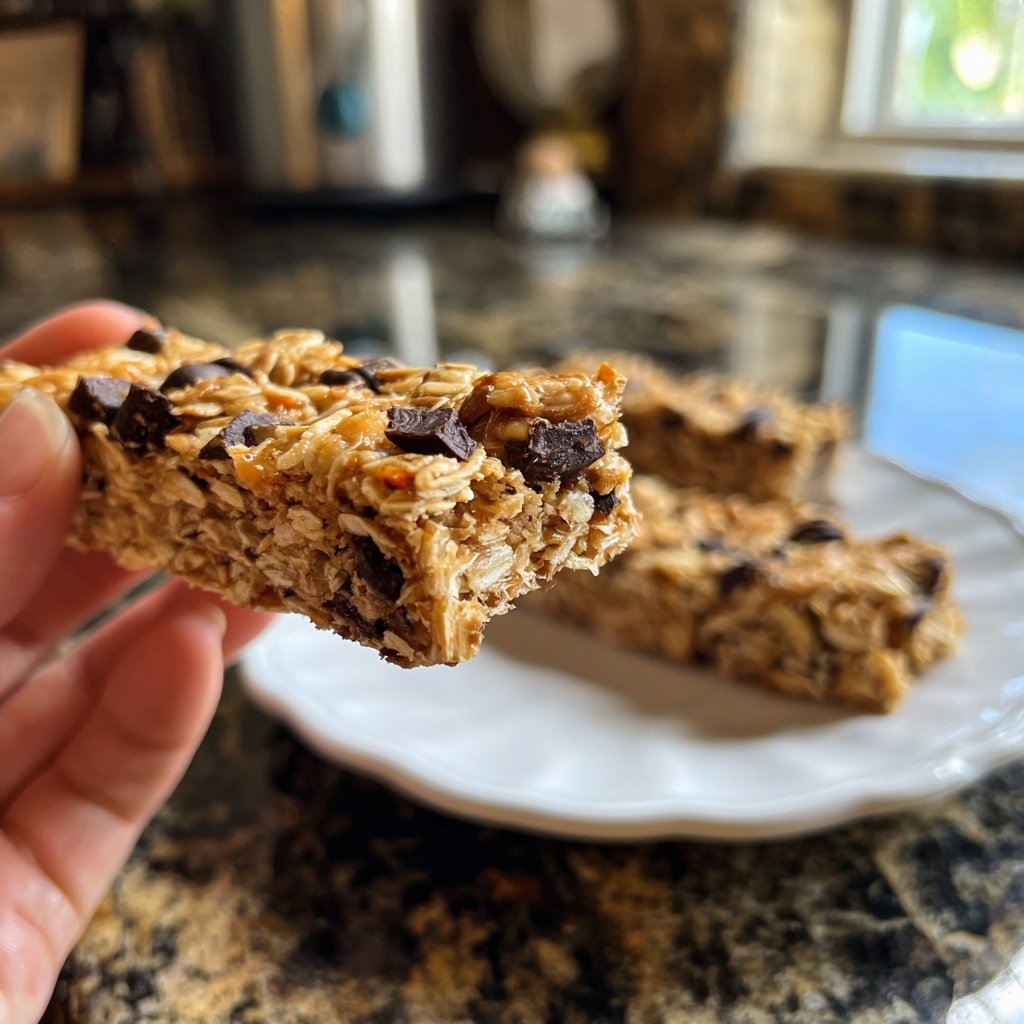
When I first made these no-bake granola bars, I was amazed at how simple and delicious they turned out. The combination of oats, honey, and peanut butter creates a perfect chewy texture, while adding a few chocolate chips gives them a delightful sweetness. I’ve tried various mix-ins, but I often find myself coming back to the classic raisin and almond combination, which never fails!
One tip that really worked for me was to let the mixture chill in the fridge for about an hour before cutting them into bars. This not only helps them hold their shape but also enhances the flavors. Trust me, once you try these, they’ll quickly become your go-to healthy snack!
Why You Will Love This Recipe
- Nutritious and naturally sweetened with honey.
- Customizable to suit your taste preferences.
- Quick and easy to prepare with no baking required.
The Role of Each Ingredient
Understanding the role of each ingredient in these no-bake granola bars is essential for achieving the desired flavor and texture. Rolled oats serve as the base, providing a chewy consistency and a hearty dose of fiber. Peanut butter not only binds the ingredients together but also adds a creamy richness that's packed with protein. Honey acts as a natural sweetener while also helping to keep the bars intact, so it’s crucial to use a high-quality honey for the best flavor.
The mix-ins add texture and taste diversity; raisins bring natural sweetness and moisture, while chocolate chips provide a delightful contrast. When choosing nuts, I prefer chopped almonds for their crunchy texture and nice flavor. However, feel free to experiment with other nuts like walnuts or pecans to suit your taste.
Tips for Perfecting Your Bars
When pressing the mixture into the pan, don’t skip the step of using parchment paper. This makes it much easier to lift the bars out once they've set. Firmly pressing the mixture down using a spatula or your hands ensures that the bars hold their shape when cut. Make sure to apply even pressure to avoid any loose edges that might crumble later.
If your mixture feels too dry, you can add a bit more honey or a splash of nut milk to help it bind together. Alternatively, if it's too wet, consider adding a bit more oats. Remember that the bars will firm up in the refrigerator, so it's better to err on the side of slightly too moist than too dry.
Storage and Variations
These no-bake granola bars can be stored in an airtight container in the refrigerator for up to two weeks. If you wish to make a larger batch, simply double the ingredients and use a larger baking pan while maintaining the same preparation method. For a fun twist, feel free to dip the bars in melted dark chocolate after chilling for a sweet finishing touch.
If you're aiming for a different flavor profile, consider adding spices such as cinnamon or nutmeg to the oat mixture. Dried fruits like cranberries or apricots can also be great additions that bring new flavors and textures to your bars. Just keep in mind that each addition may slightly alter the final consistency, requiring adjustments in the binding ingredients.
Ingredients
Ingredients
- 2 cups rolled oats
- 1 cup peanut butter
- 1/2 cup honey
- 1/2 cup raisins
- 1/4 cup chocolate chips
- 1/2 cup chopped almonds
Instructions
Prepare the Mixture
In a large mixing bowl, combine the rolled oats, peanut butter, and honey. Stir until well mixed.
Add Mix-ins
Fold in the raisins, chocolate chips, and chopped almonds into the mixture until evenly distributed.
Press Into a Pan
Line an 8x8 inch baking pan with parchment paper. Transfer the mixture to the pan and press down firmly to create an even layer.
Chill and Set
Refrigerate for at least 1 hour to help the bars firm up.
Cut and Serve
Once set, remove from the pan and cut into bars. Store in an airtight container in the fridge.
Pro Tips
- For added flavor, try using different nut butters like almond or cashew. You can also experiment with other dried fruits such as cranberries or apricots to vary the taste.
Make-Ahead Options
These granola bars are an excellent make-ahead snack due to their easy storage and prolonged shelf life. Prepare a batch on the weekend, and you’ll have a quick, healthy option for breakfasts or snacks throughout the week. You can individually wrap each bar in plastic wrap for convenience, making them easy to grab and enjoy on busy mornings or during the day.
If you plan to store them longer than a week, consider freezing the bars. Wrap them tightly in plastic wrap and aluminum foil, and they will remain fresh for up to two months. When you want to enjoy one, simply let it thaw in the fridge for a few hours, or at room temperature for a quicker option.
Troubleshooting Common Issues
If you find your granola bars are falling apart, it often comes down to either insufficient binding or not pressing firmly enough into the pan. For future batches, ensure that the peanut butter and honey are thoroughly mixed in and consider adding a little more honey to improve cohesion. The pressing step cannot be emphasized enough to prevent crumbling later.
Conversely, if the bars are too hard or difficult to bite into, this may indicate that they have been over-chilled or pressed too firmly. In this case, you can soften them by microwaving for a few seconds, but be careful not to overheat. To prevent hardness in the future, keep an eye on the chilling time and adjust based on your refrigerator’s cooling capacity.
Questions About Recipes
→ Can I use a different nut butter?
Yes, feel free to substitute peanut butter with almond, cashew, or any nut butter of your choice.
→ How long will these granola bars last?
These bars can last up to 2 weeks when stored in an airtight container in the fridge.
→ Can I make these granola bars vegan?
Yes, substitute honey with maple syrup or agave syrup for a vegan version.
→ What can I use instead of oats?
If you need a gluten-free option, you can use gluten-free oats or even puffed rice.
Healthy Snack No Bake Granola Bars
What You'll Need
Ingredients
- 2 cups rolled oats
- 1 cup peanut butter
- 1/2 cup honey
- 1/2 cup raisins
- 1/4 cup chocolate chips
- 1/2 cup chopped almonds
How-To Steps
In a large mixing bowl, combine the rolled oats, peanut butter, and honey. Stir until well mixed.
Fold in the raisins, chocolate chips, and chopped almonds into the mixture until evenly distributed.
Line an 8x8 inch baking pan with parchment paper. Transfer the mixture to the pan and press down firmly to create an even layer.
Refrigerate for at least 1 hour to help the bars firm up.
Once set, remove from the pan and cut into bars. Store in an airtight container in the fridge.
Extra Tips
- For added flavor, try using different nut butters like almond or cashew. You can also experiment with other dried fruits such as cranberries or apricots to vary the taste.
Nutritional Breakdown (Per Serving)
- Calories: 200 kcal
- Total Fat: 10g
- Saturated Fat: 2g
- Cholesterol: 0mg
- Sodium: 50mg
- Total Carbohydrates: 24g
- Dietary Fiber: 3g
- Sugars: 10g
- Protein: 5g